Trailers and trees

This painting is done with phthalo blue, burnt sienna, nickel dioxin yellow and quinacridone rose. The blue color can be replaced with e.g. Prussian blue or any other modern synthetic blue color. The brown sienna can be changed to any orange-brown color, the same with the yellow, any yellow works. I use the red quinacridone color to make the gray color that I mix with blue and brown less green and to make the green color mixture that without red color becomes unnaturally clear green.

I have followed the principle “from behind and forward” in this painting. Start at the back of the subject and work your way forward.
Step 1

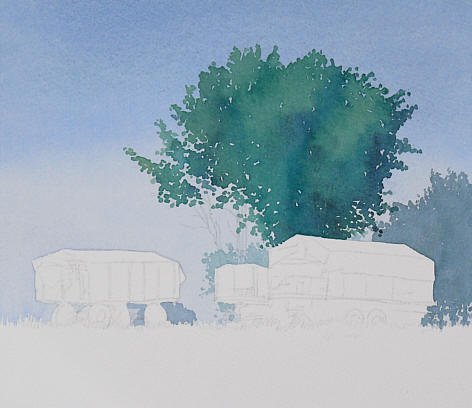
The sky is the first thing you should paint in this picture, Dilute your blue color with just enough water in a mixing cup. Apply at the top and paint a small part of the surface that should be sky. Then add more water to your blue color, paint another little bit with this slightly lighter color. Continue in this way and add more water gradually so that the sky becomes brighter at the bottom of the picture. Paint around the trailers, do not forget to paint grass at the bottom, Alternatively, you can continue to paint with just water all the way to the bottom of the painting. What you have now done is called a graded wash, a flat color surface that gradually changes color tone or value.
Step 2

According to the principle from behind and forward, the trees must now be painted. Start with the trees in the background, I have painted them lighter and flatter than they are in the photo. This to create more sense of depth in the painting, I chose a blue-green-gray color that I painted completely flat. Beware of the contours though, the trees need to look natural, even if they are just silhouettes. Let the first trees dry before you start painting the front tree. For that trees you need to mix to two different green colors. One light yellow-green color and another dark blue-green color. Make these color blends with as much difference in value and hue as possible. You should paint them so that the colors flow into each other on the paper, then the colors need to be very different to not just appear as one and the same color once they are mixed on the paper.
Just like when you painted the first trees, pay close attention to the contours of the trees, care less about how the colors appear on the surface itself. Start with the light green color, paint a small piece of the tree with it, then paint with the dark color a small piece. Let the colors flow together on the paper, use a lot of color, create a puddle of paint on the paper and transport this puddle further over the paper while constantly adding more color. Remember to use the dark color in a strategic way so that you create a believable shape of the tree. Light on the left side of the tree and darker on the right, with slightly darker parts here and there.
Step 3

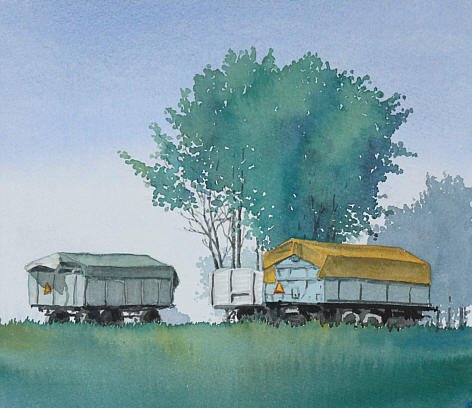
Paint the trailers with canopy completely flat, shadows that fix the shape you do later. Also paint the grass in the foreground. For the grass, use the same technique as for the large tree: A light green and a dark green color are mixed on the paper so that a nice pattern emerges. Feel free to make the grass darker at the bottom. Remember to paint grass tops at the top so that it looks natural. Also paint all the trunks and branches of the trees with a small brush. Mix blue and brown for these.
Step 4

Mix a black color with brown and blue, if the mixture becomes greenish, add a little red. Take some of the mixture and transfer to an empty mixing cup, dilute the paint with water to create a lighter shade color to be used for shadows on trolleys and tarpaulin. When the shadows are painted, take the black color and paint the wheels of the carriages with it. Watch out for the grass in front of the wheels.


