
Pouring and tilting Watercolor Paint
February 13, 2025

To create smooth and seamless transitions with watercolor, artists often use the wet-on-wet technique, which involves applying paint to already wet paper. Another way to achieve similar effects is to use generous amounts of water and paint, allowing you to create different patterns by tilting the paper in various directions, thereby moving the paint across the surface. Tilting the paper and letting the paint glide over it is often referred to as “tilting the paint*.” This technique works exceptionally well for painting skies but can also be useful for other parts of a painting.
*In Swedish, we call the technique “valla”, which means “to herd”—for example: “I herd the sheep” / “I herd the watercolor paint.” I had trouble finding a good translation for the word, but “tilting the paint” appears to be used, so I will go with that translation.
“Pouring watercolor paint” usually means that the paint is pre-mixed, stored in a small bottle or container, and then poured onto the wet paper. However, I don’t like this method—it often results in too much paint and an uncontrollable outcome. Instead, I prefer to wet the paper and then use a brush to place generous amounts of paint where I want it. This way, you can target the specific areas of the painting that need color while maintaining an adjustable and controlled amount of paint.
To succeed with this technique, you should use paper that is mounted flat on a surface. A block with glued edges works, and a sheet mounted with masking tape on a board can also be effective. However, the best option is a stretched sheet of paper, as it will only buckle slightly when large amounts of water are applied. Other options will cause the paper to warp. This technique does not work on a loose sheet unless it is very thick—paper with a weight of 640 gr/²m (300lb) will work, but anything thinner is unsuitable. The technique requires a relatively smooth and stable surface.


Before you begin wetting the paper, it’s a good idea to pre-mix the colors you plan to use for the “poured” area. You can use one or multiple colors. Keep in mind that granulating colors become more pronounced when they are forced to move across very wet paper. I avoid such colors for this technique since they result in a very grainy appearance. The colors you choose for your painting will appear significantly lighter because they spread over a much larger area than they would with traditional painting methods. Therefore, mix them with less water—since the paper is already wet, less water is needed in the paint mixture.
Start by wetting the section of the paper where you will apply this technique. Be very careful when reserving the areas of your painting that should remain untouched. For example, if you are painting a sky with a house in the foreground, you must leave out the house precisely—approximating is not good enough.
Once the entire surface is wet, check that there is enough water for it to move when you tilt the paper. If you cannot see the water shifting across the surface, there isn’t enough—add more.
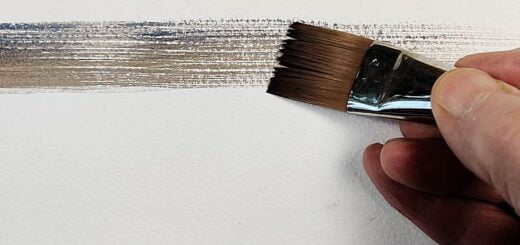
Next, load a large brush with paint and dab it onto the wet paper. Avoid regular brush strokes; by dabbing the brush repeatedly, you release more paint than with traditional strokes. You can tilt the paper to move the paint across the surface, adding more or different colors as needed. You should have enough water and paint to allow easy movement across the paper. You can also dab more water if necessary or to create lighter areas.


Many people worry that the large amount of water will flow over the reserved areas. While this is a risk, it only happens if you tilt the paper too much. Adjust the tilt depending on the amount of liquid on the surface. As the paint dries, it moves less, allowing you to increase the tilt for stronger effects.
This wet-on-wet painting method is an excellent way to create expressive and smooth transitions. It works well with both dark and light colors. Like all techniques, achieving a successful result on the first try is unlikely—practice is essential to mastering it. The most common mistake is underestimating how much liquid is needed for the effect to work. My advice: it’s better to use too much water than too little.
Another common mistake is using colors that are too light, causing them to disappear into the water. The paint should be roughly four times darker than in regular watercolor painting since it will be diluted by the water already on the paper and further thinned as it spreads across the wet surface when the paper is tilted.
Naturally, it’s impossible to plan the exact outcome when painting this way. But that is the charm of watercolor—you don’t always get what you originally intended. When using this technique, you must embrace the result that the colors and water create. You can guide the paint by tilting the paper and nudging it in the right direction, but ultimately, you are not in full control.


Hi Erik,
I’m curious, do you ever paint on hot press paper?
Watercolor paper becomes less absorbent the harder it is pressed. Hot-pressed paper is very hard pressed, I don’t like the surface of such paper, too smooth and water-repellent for me. For this reason I never use hot-pressed paper.
Thanks Erik