Yellow Houses: Watercolor Wash Exercise
October 5, 2025

When painting an exercise like this, with many washes, it can be useful to think about which colors are suitable for the technique. Since a flat wash is a way of painting that depends on fluidity and the ability of colors to follow generously applied paint, you should choose colors that support this type of painting. Avoid paints with heavy, clumpy pigments. That means: don’t use colors that granulate, but instead choose paints that flow easily in water—these are often staining.
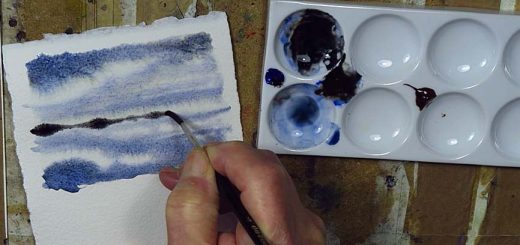
Before you start painting this picture, you need to know what a flat wash is. It is a painting technique that makes it possible to achieve an even layer of color over a large surface. If you’re unsure how such a surface is painted, you should first read about it. You can also do a small practice exercise on washes. All the large color areas in this painting should be painted with washes: the blue sky and the yellow houses, and perhaps also the reddish-brown fascia board on the front house. The rest—chimney, windows, and other details—are painted without washes, so you don’t need to tilt the paper or paint with a lot of flowing color for these.
I suggest the following colors:
- Phthalo Blue, though Prussian Blue or Indanthrone (slightly blackish) will also work.
- Quinacridone Rose, though other cool reds also work well.
- Any warm yellow. I used Nickel Azo, but any warm yellow will do.

Step 1
All color areas in this first stage should be painted with washes. Tilt the paper and apply paint generously.
Start with the blue sky. I used pure Phthalo Blue, only diluted with a little water. Since it’s difficult to wash an area that tapers into a point—such as on both sides of the rear yellow house—it can be a good idea to paint the sky with the paper upside down.

So, turn the paper, start at the point to the left or right of the gable. After a few brushstrokes, switch sides and paint a little of the area on the other side of the house. Continue alternating sides until the paint meets at the chimney. In this way, you can wash the same color across the entire sky.
Wait until the blue color is dry, then paint one of the two yellow house gables. The rear gable has two windows that can cause problems. When you wash with tilted paper, the paint will pool above the windows, and you risk darker patches there—or in the worst case, a bloom. As you can see, my paint became slightly darker above the windows, something I could have avoided if I had tilted the paper 45° to the left or right. So: if your yellow pools above the windows, tilt the paper so the paint flows beside them instead.
I chose not to paint over the anchor tie—the iron beam ending that is visible on many old houses. In this picture, it’s above, between the windows. You can just as well paint over it and later add it in black.
The lighter gable on the right is much easier to paint; it’s just a smooth surface. Neither of the houses can be painted with pure yellow. The paint must be mixed to look like a believable house color. The rear house is a bit warmer and duller than the front one. The yellow mixes should be made primarily from yellow with a tiny amount of both blue and red until you achieve a reasonable hue.
Step 2
In this step, I painted some small details such as the red fascia board, the roof tiles, the chimney, and the black-painted “barrel” on the roof—whatever it might be.
Start with the roof tiles on the rear house by mixing a brick color from all three paints. To make the color for the red fascia board, just add a little extra red to the brick color you already used for the roof tiles.

To create a black color, mix all three in roughly equal parts with minimal water. Then you can dilute a little of that mixture with water to create the chimney color.
Steg 3
Now only the windows and the anchor tie remain. Paint the windows from light to dark. That is: start with the lightest and finish with the darkest. First the light shadow on the roller blind, then the green window frame and mullions, then darker green on the shaded parts of the frame and mullions. Finish with the black lower section of the window. If you want a very light color over the blind, paint that first. I skipped this myself and left the blind unpainted, just white.
The anchor tie is painted black if you painted over it with yellow earlier; otherwise, paint it in a grayish tone with shadows. The vent to the left of the windows can be added with just a few black strokes, if you want it—it might be unnecessary.
This exercise is training in washes: painting smooth surfaces by tilting the paper and using generously applied color. It also trains color mixing: learning to mix a wide range of colors, even black, from just a few pigments.